
A clean, polished PDF is the foundation of a great flipbook. Here’s how to prepare your file the right way before converting it into an interactive, page-flipping publication.
Flipbooks have become one of the most engaging ways to present catalogs, magazines, brochures, and reports online. They turn a static document into an interactive experience that feels like flipping through a real printed book. But there’s a step most people skip — or do poorly — and it can make or break the final result: editing the PDF before you convert it.
A flipbook converter simply takes the pages of your PDF and turns them into a page-flipping viewer. It doesn’t fix typos, resize oversized images, remove unwanted pages, or reorder content. All of that has to happen before conversion. In this guide, we’ll walk through exactly what to check and edit in your PDF, and then show you how to turn the finished file into a professional flipbook.
Why PDF Editing Matters for Flipbooks
Unlike a regular web page, a flipbook is meant to look like a physical publication. Readers expect crisp pages, consistent formatting, and no distracting errors. If your PDF has outdated pricing, broken layouts, low-resolution images, or extra blank pages, all of those issues will be baked directly into your flipbook — and they’re much harder to fix once the flipbook is published than they are while you’re still working with the PDF itself.
Editing first also saves you time. Instead of re-exporting and re-uploading a corrected flipbook multiple times, you get it right at the source and convert once.
Step 1: Review the Document Structure
Before touching any content, open your PDF and go through it page by page. Look for:
- Blank or duplicate pages that shouldn’t appear in the final flipbook
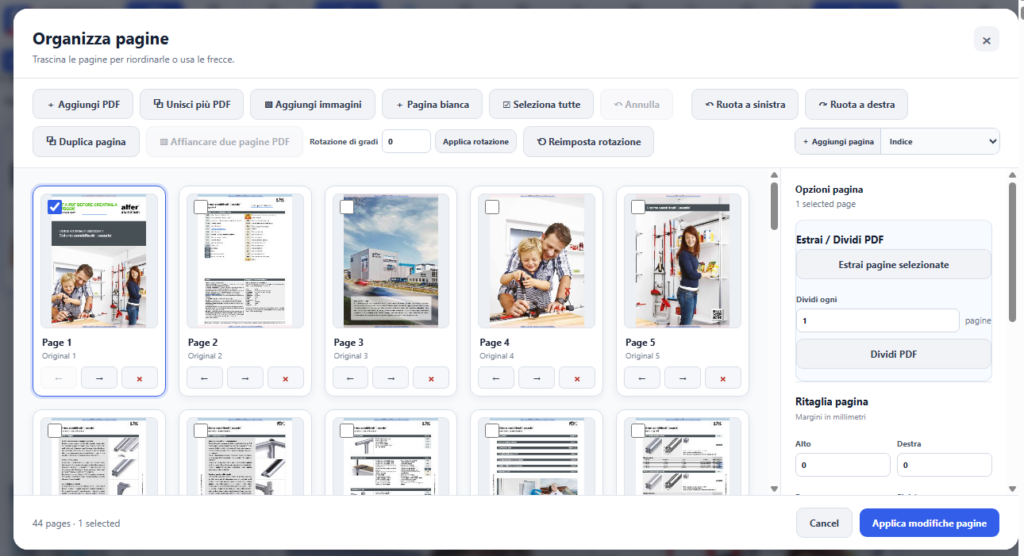
- Pages that are out of order and need to be rearranged
- Inconsistent page sizes or orientations
- Missing page numbers or a table of contents that no longer matches the layout
Step 2: Fix Text and Content Errors
Once the structure looks right, focus on the actual content. Typos, outdated information, broken links, and formatting inconsistencies are much easier to notice at this stage than after conversion. This is where a dedicated PDF editor becomes essential, especially if you don’t have access to the original design file (InDesign, Word, or similar) and need to work directly on the PDF.
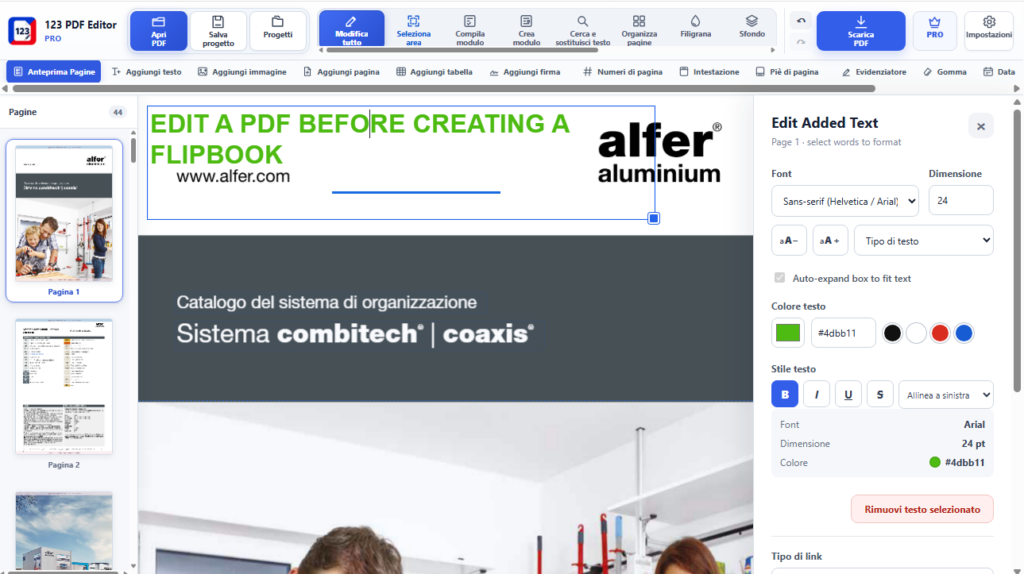
For this part of the process, we recommend using 123 PDF Editor, a browser-based Chrome extension built specifically for quick, local PDF editing. It is available also as Android app, Windows and MacOS software. But we recomment the chrome extension version for following reasons:
- All editing happens locally in the browser — your files are never uploaded to a server, which is important if you’re working with confidential catalogs or client material
- You can edit text directly on the page, correct typos, and update pricing or contact details without rebuilding the layout
- It supports rearranging, deleting, and merging pages, so you can clean up the document structure from Step 1 in the same tool
- Compressing the file is built in, which helps keep the final PDF (and later, the flipbook) lightweight and fast to load
Since it runs as a Chrome extension, there’s no software to install and no file size limits imposed by a slow upload — you simply open your PDF and start editing.
123 PDF EDITOR screenshot:
Step 3: Optimize Images and File Size
Flipbooks are visual by nature, so image quality matters — but so does loading speed. Oversized, uncompressed images are one of the most common reasons flipbooks feel slow or clunky to readers. Before conversion, check that:
- Images are high-resolution enough to look sharp when zoomed, but not so large that they bloat the file
- The overall PDF file size is reasonable — a compressed PDF will convert faster and produce a flipbook that opens quickly for your readers
- Any low-quality or placeholder images have been replaced with final versions
Step 4: Do a Final Proofread
Once the structure, text, and images are in place, go through the PDF one more time from start to finish. This final pass is your last chance to catch anything before the file becomes a flipbook — after conversion, making changes usually means editing the PDF again and re-converting, so it’s worth taking the extra few minutes here.
Step 5: Convert Your Polished PDF Into a Flipbook
With a clean, error-free, well-optimized PDF ready to go, it’s time to bring it to life as an interactive flipbook. For this step, we recommend MyFlipbook, a straightforward tool for converting PDFs into realistic, page-flipping digital publications.

Once your file is imported into MyFlipbook, you can:
- Add realistic page-turn animations that mimic a physical publication
- Customize the toolbar, background, and reading experience to match your brand
- Publish the flipbook online and share it via a link, or embed it directly on your website
Because you’ve already handled the cleanup and editing in the previous steps, the conversion itself becomes quick — there’s no need to go back and forth fixing content after the fact.
Quick Checklist Before You Convert
- Pages are in the correct order, with no blanks or duplicates
- Text has been proofread and corrected with a PDF editor like 123 PDF Editor
- Images are optimized for both quality and file size
- The file has been compressed where possible
- A final read-through has been completed
Final Thoughts
A great flipbook starts with a great PDF. Taking the time to edit, clean up, and optimize your document before conversion means fewer headaches later and a much more professional result for your readers. Use a tool like 123 PDF Editor to edit text on PDF or add links to a PDF directly in your browser, then bring your polished file into MyFlipbook to turn it into an interactive publication that’s ready to share with the world.
With the right preparation, your flipbook won’t just look good — it will read exactly the way you intended, from the first page to the last.